
I made the pinhole camera from a kit last summer, and when I shot my first roll of film with it, I found some tricky points. The camera needed to be made a little more lighttight, I wanted to find a way to keep the dowels that advance and rewind in place so I wasn’t dropping them and chasing after them, and I wanted a clearer way to know I was advancing the film enough.
But I was distracted by other things last summer and in the fall and I didn’t get back to this until this winter. Over a few days in February, I spent some time adding more tape to the camera. I also found some rubber bands, which I used to keep the front and back squeezed together. I hoped that might make the frame edges a bit sharper.
I was also able to make an auditory clicker that I could use to count sprockets when advancing the film. I found this idea on the Pinholica blog; you have some sort of material that the sprockets of the film ride over. As each sprocket hole passes over the material, the material pokes into the sprocket and makes a click click click sound. (Did any of you ever tape a playing card to the frame of you bike so it made a sound as the wheel turned? That’s a similar sort of idea.)
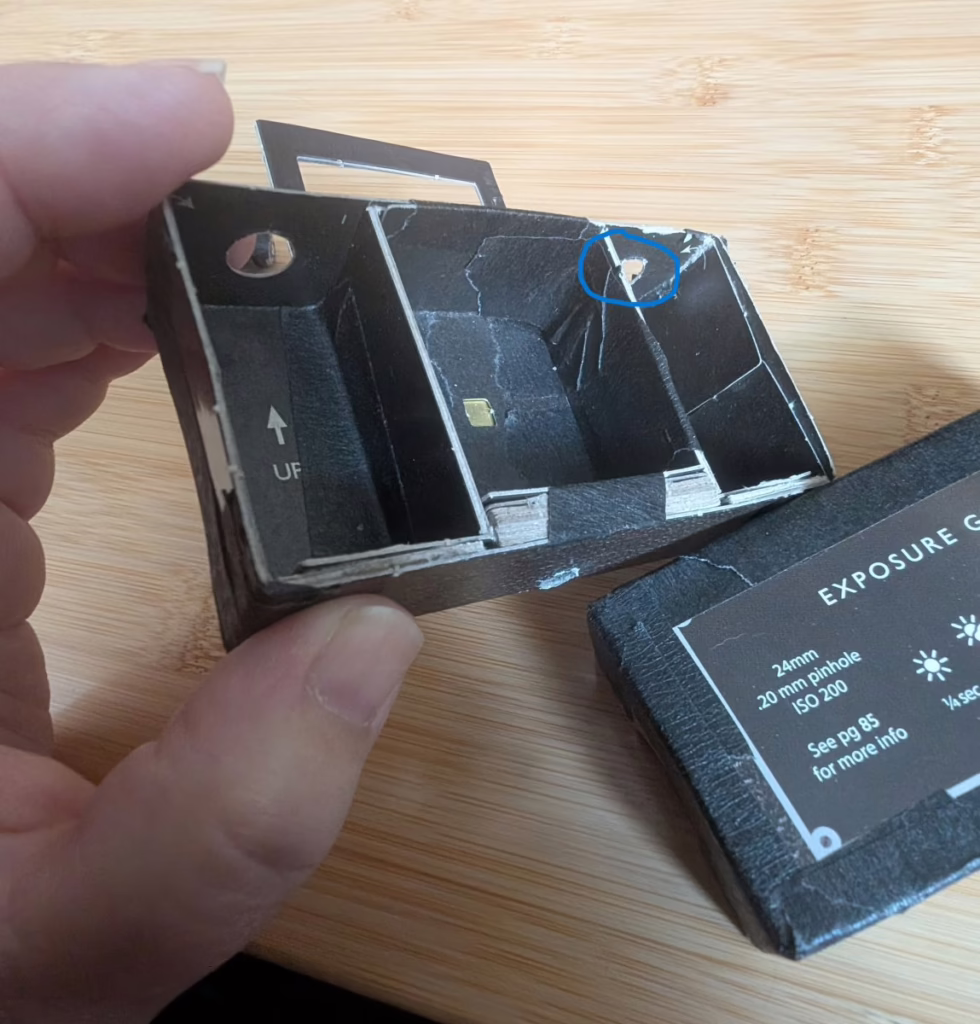
I experimented with some different types of plastic. Some were too soft and bent too much, making little to no sound. Some of them were too stiff, and they ripped through the sprocket holes. We have a multi-sized pack of zip ties, and I found one of the smallest zip ties made for the best clicker.
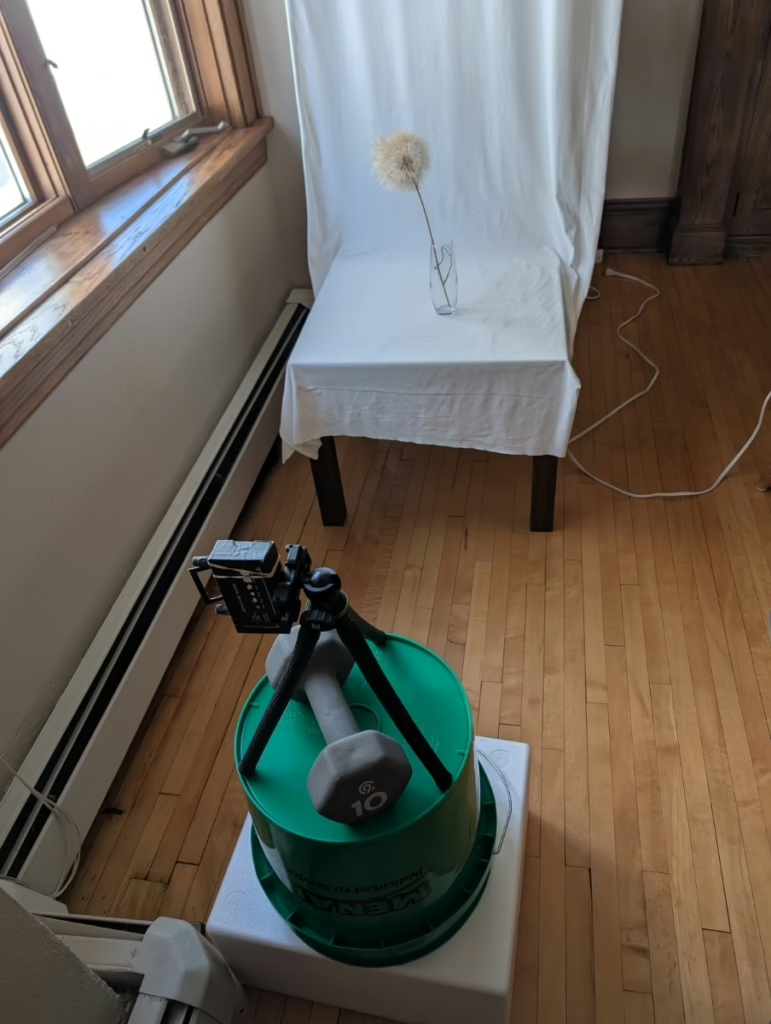
I had been wanting to try some still life photography, so I set up a spot near a window where I could leave the camera for a long time. I used a pinhole calculator to estimate my f/stop and used a light meter app on my phone to estimate how long I’d need for my exposures. I bracketed too, since it gets harder to get things right as you go to extremes (like utterly tiny apertures).
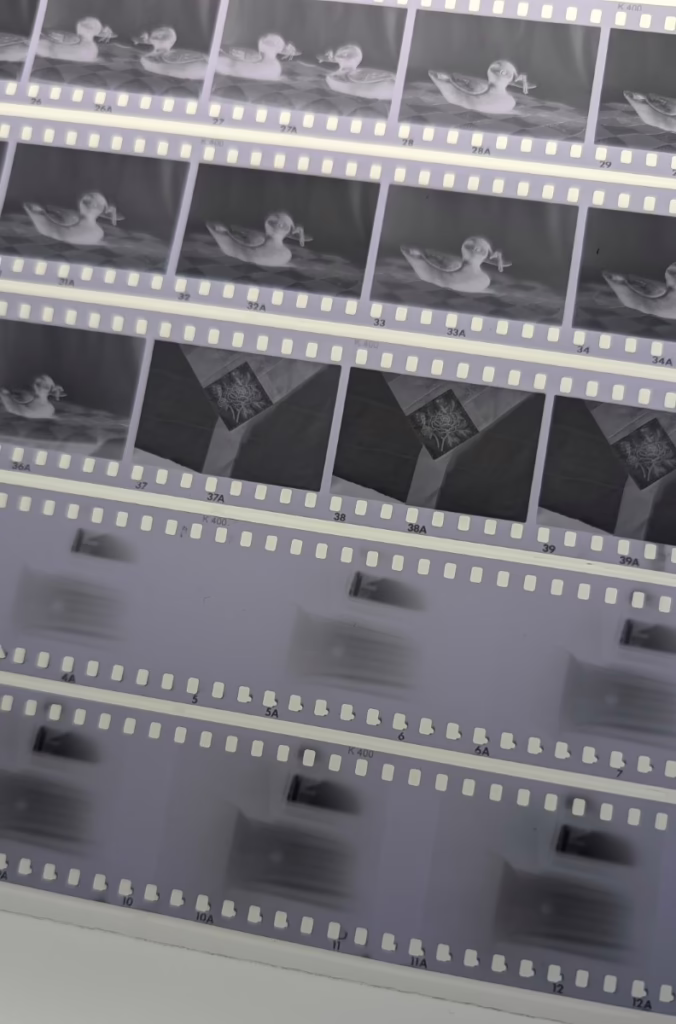
To compare, I also used my Contax RTS II to take photos.
I use a small lightbox to takes photos of my art, but other than that, I don’t tend to set up photos like this. The last time I really did anything like this was in my high school photography class. So it was a bit of an adventure to figure out a backdrop, how I could use natural light, and how to get my tiny little pinhole camera at the right height.
When I processed the photos, I found that the edges of the frames were much cleaner (so the rubber band helped). The sprocket clicker also helped because there’s a clear gap between the frames. I didn’t notice any double exposures, so I remembered to advance the film. I’m still having difficulty with exposure. I definitely need to spend more time on that.
What this Residency a Success or Failure?
I haven’t done a “true” artist residency. But I’ve read a lot about what others do at residencies. And I know that having a plan and holding it loosely is part of doing a residency. I think with an at-home residency, where one doesn’t have the luxury of completely escaping the stuff that comes with being at home, this is perhaps even more true.
My at-home residency goals were to make three cameras (this kit camera, a paper negative camera, and another small film camera) and shoot multiple sessions with each type of camera. My timeline was to have this done nearly a year ago. By those standards, this at-home residency was a failure.
But I learned a lot from this. I learned some problem solving skills and how to be more systemic with my note taking and photography attempts. I learned (again!) how hard it is to make a lighttight box.
And most importantly, I learned that it’s OK to say “this isn’t a good fit right now.”
I have always been the type of person who has forty-seven things going on at once. I have long lists of ideas for writing, reading, photography, fiber arts, walks, travel locations—you name it. I can have a hard time knowing when to let go of something and I also have a hard time actually letting go of things. Often that means ideas or half-done projects hang over me like psychological clutter. It can also mean having physical clutter in the home as I’m afraid to get rid of things I haven’t used in years and likely won’t ever use again. I keep them because they were part of my identity at one time and just in case I suddenly decide to come back to something.
Right now, I’m putting a pause on this at-home residency. I’m still interested in pinhole photography and I expect I will return to this idea in the future. But I’m trying to work in series more (because I want to have more work that goes together in a clear, coherent group) and I’m trying to bring some fiber arts back into my life (since last year was so photo heavy). Part of that is narrowing my focus to a reasonable amount of projects/practices/work spots in my home.
In this case, I know that right now is not the right time to keep this project going. Right now I can put the pinhole idea to rest, knowing that I can come to it later.
And in that way, this at-home residency was a success.